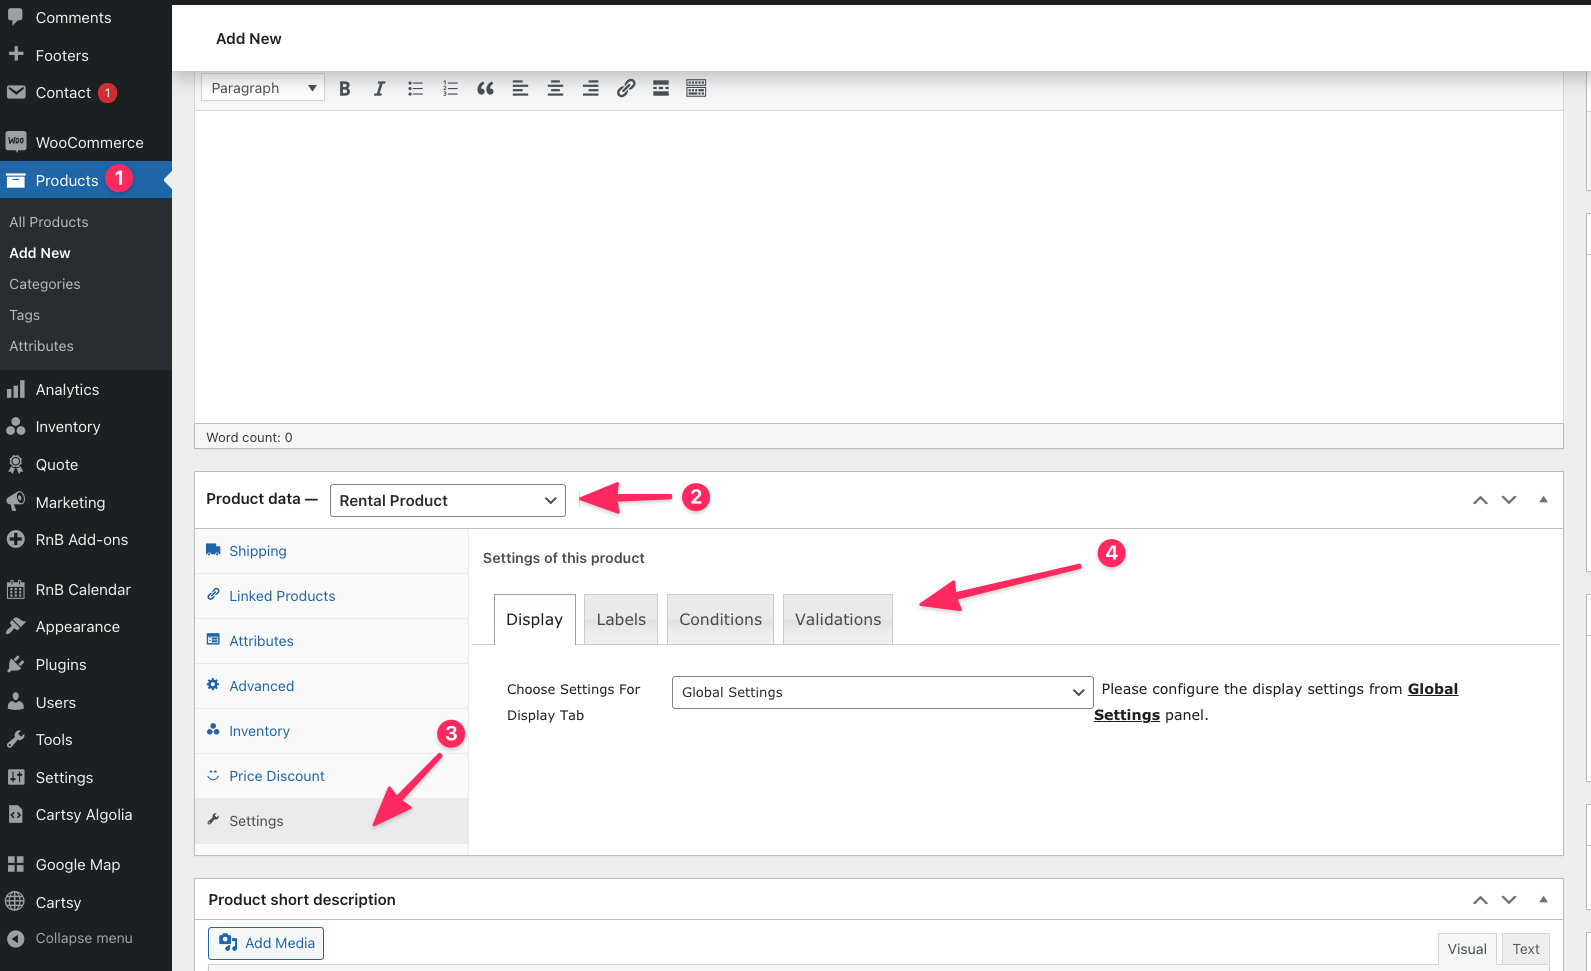
Product Settings
Local Settings and Global settings
In the RnB settings portion, WooCommerce Rental product has 4 options.
- Display
- Labels
- Conditions
- Validations
All the options have 2 different settings.
- Local Settings
- Global Settings
Local Settings
Local settings mean that the settings will work for that individual product or that specific options only. To set up these settings, please go to settings->Any of the tabs(Display/label/Condition) and select local settings from the drop-down.
As these settings is named as local settings, it will work for this product only.
Global Settings
Global settings mean that the settings will work globally or for each and product. To add global settings, you need to follow two steps:
In the first step, please go to WooCommerce->settings->Go to RnB settings and then set
your desired settings by going those tabs
- General
- Display
- Labels
- Conditions
- Validations

In the second step,please go to settings->Any of the tabs(Display/label/Condition) and select global settings from the drop-down.

N.B: If you need global settings for all products and local settings for two or three products, Then set the Global settings for all of the products and then go to that two or three product and set the settings to local settings.
Change Label
Our plugin provides the options to change every text and placeholder from it's settings panel. It has two setting panel one is local settings which works individually for each product and another is global settings which works for all product once you set the global options for a product.
You'll get global settings from
- wp-admin -> WooCommerce -> Settings -> RnB Settings

And local settings from WooCommerce product tab

Change Display
Our plugin provides the options to unable or disable pickup and return date & time field of a product. If you want to disable the time field of the product then you have to strictly configure some settings which are given below:
- time format - 24 hours
- max hour late - 0
- pay extra hour - No
- Single Day Booking - Checked
- time interval - 1
Change Conditions
You'll find these setting from Conditions settings tab of product back-end or if you want to set the Conditions globally for all of your products
you can go to Dashboard -> Woocommerce -> Settings -> RnB Settings ->conditions tab to configure the similar options
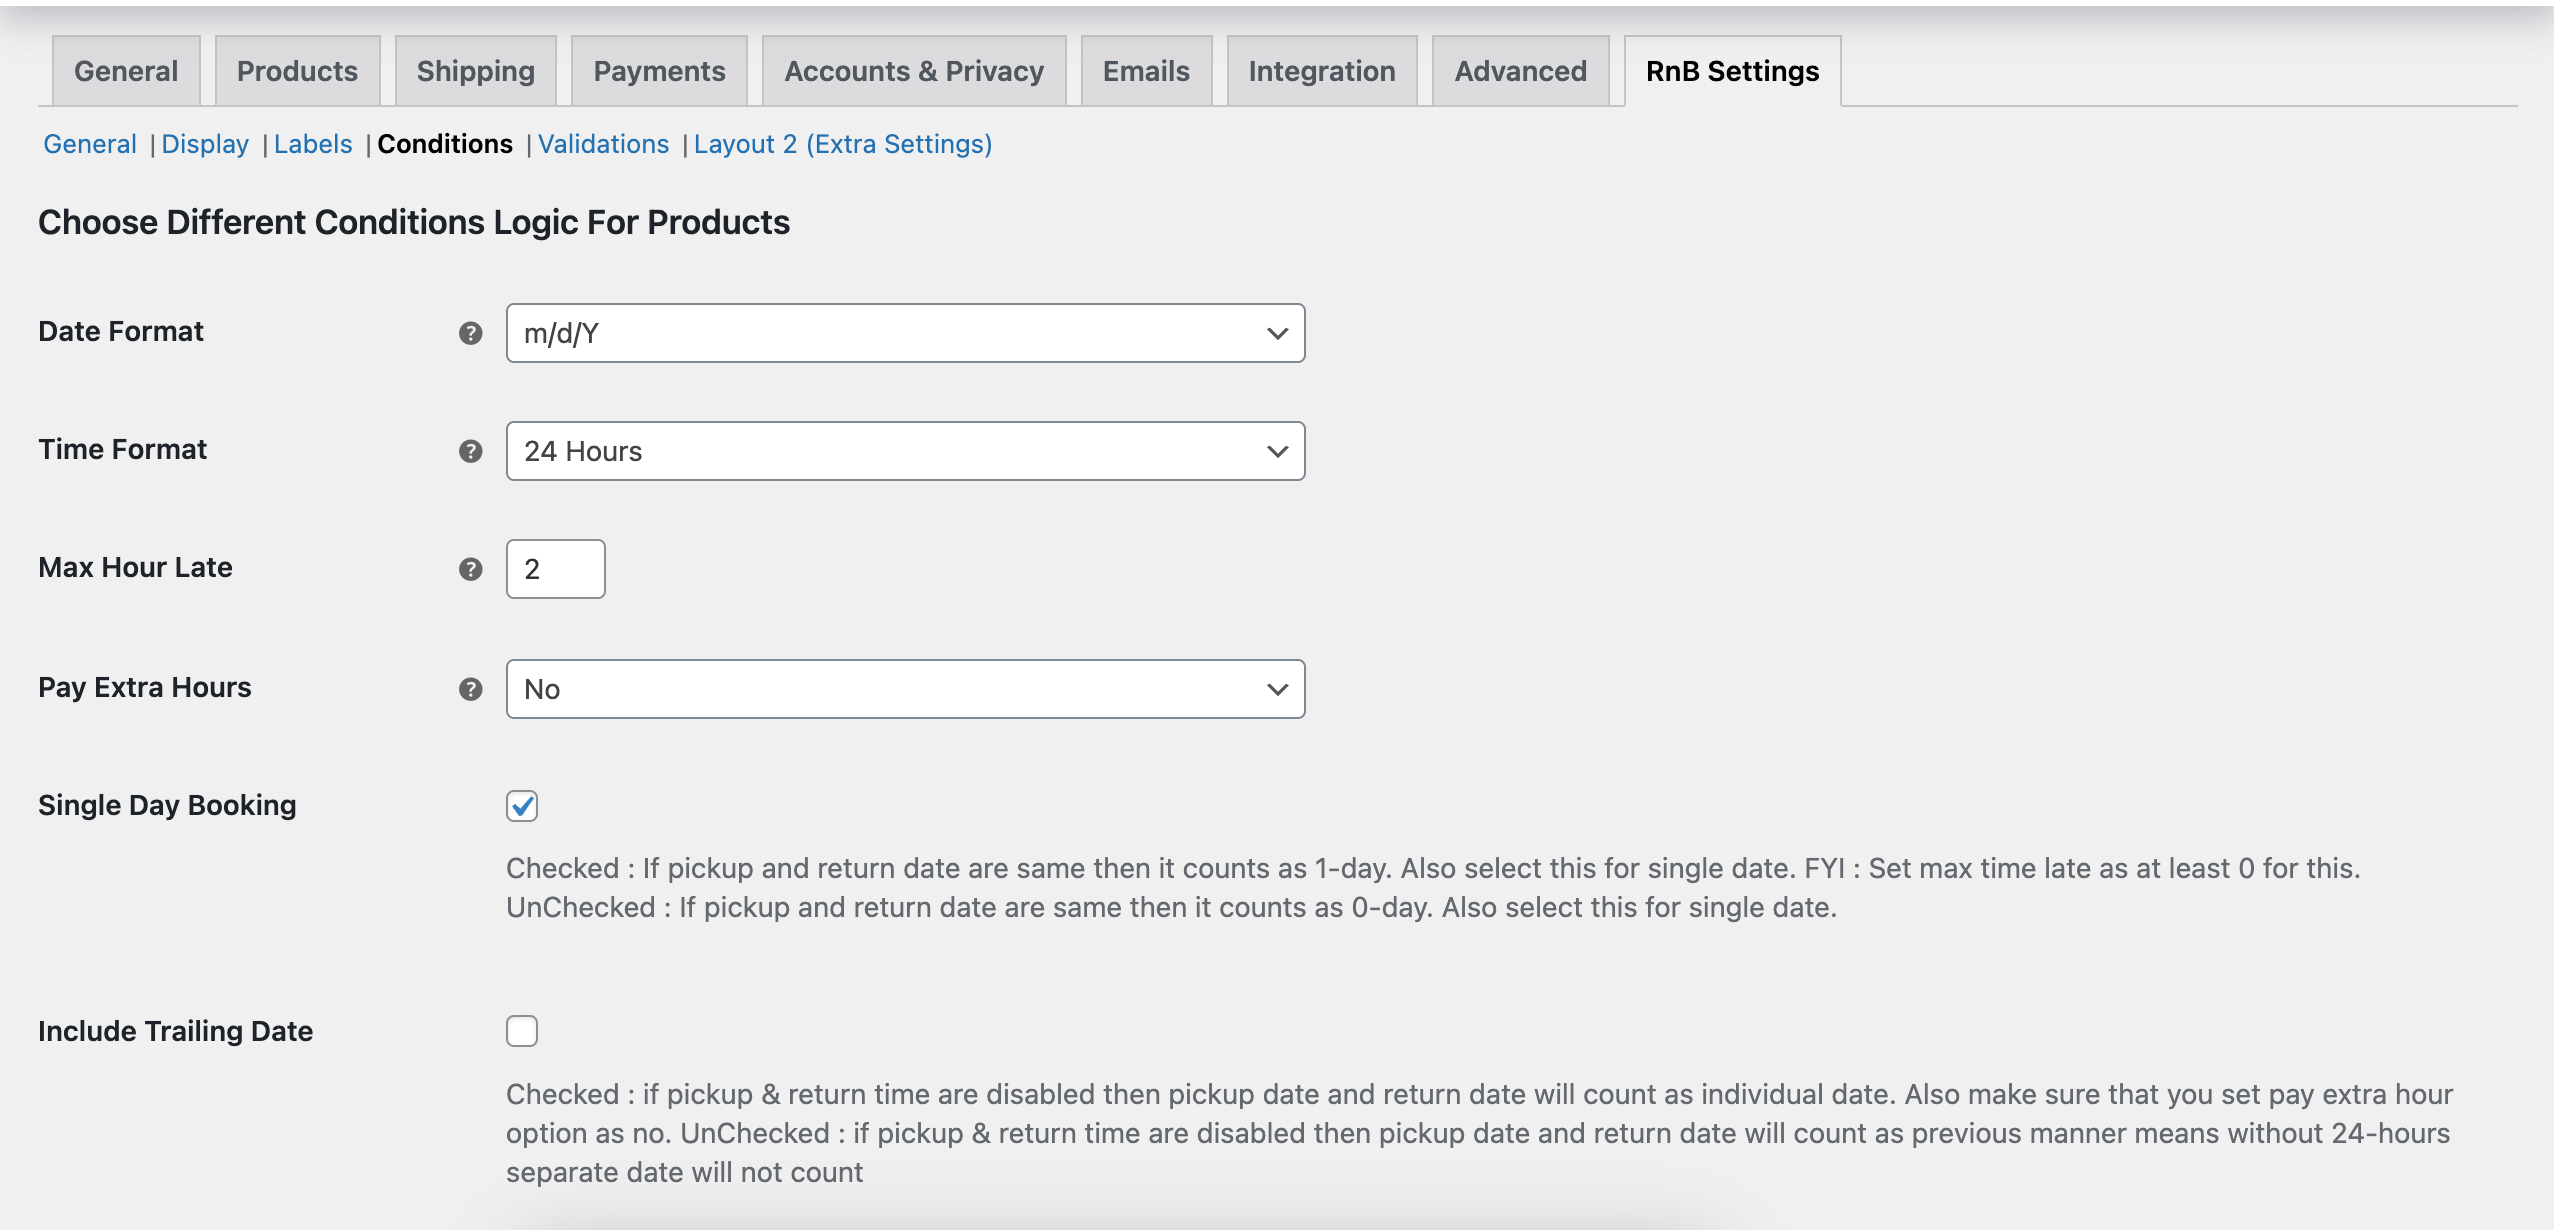
Date Format
This plugin allow you to choose there different date-format.The date will be displayed in all places like the chosen format.
- m/d/Y
- d/m/Y
- Y/m/d
Time Format
You can set your time format to either 24 hours or 12 hours. however by default the time format will be 24 hours.
Max Hour late
You can set max hour late during return time from here. If anyone cross this limit of time then another day will be count as his reservation days and price will be calculate depending on this.
Pay Extra Hours
This option gives you the option of charging your customers for the extra hours that they book rather than the full day. For example you have a daily price of $10 and general price of $2. If you set this option to yes then if a customer rents a product for 25 hours then he will be charged $12 i.e. daily price of $10 for 24 hours and then $2 for the extra hours. However for this you have to keep single day booking option unchecked.
Single Day booking
This option allows you to charge your clients for a single day price even if they book for less than 24 hours.
Enable Trailing Date
This option allows you to consider a date as a single day if tiem and date field is disabled.
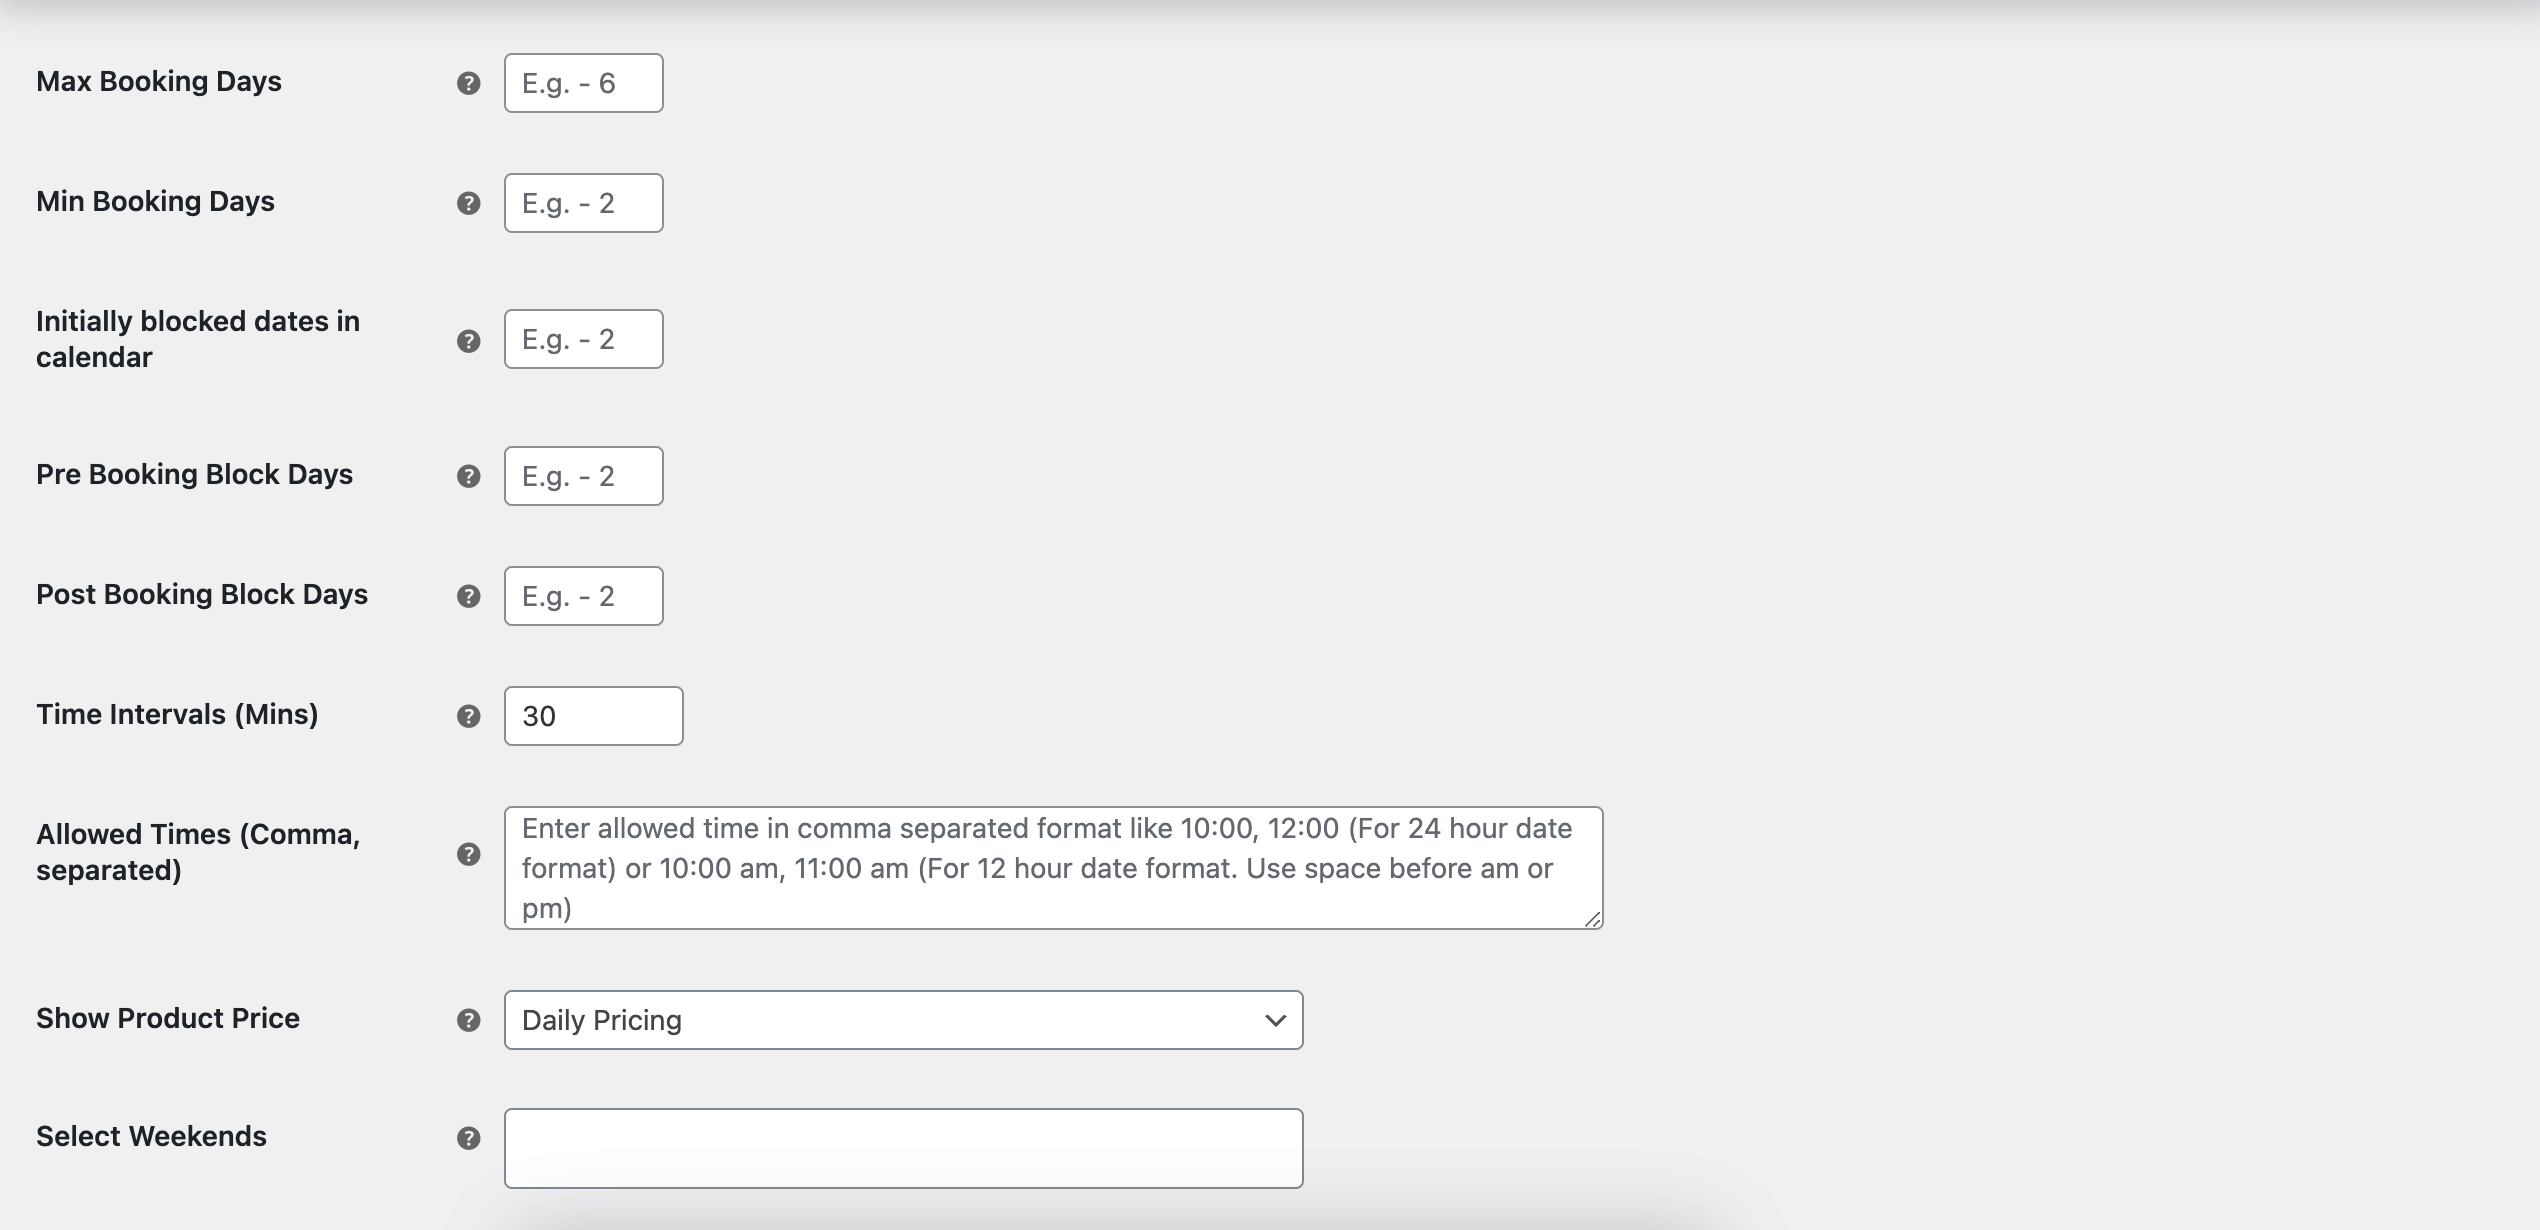
Maximum Booking Days
You can set booking maximum days from here.
Minimum Booking Days
You can set booking minimum days from here.
Initially Block days
This option of our plugin allows you to block dates of the calendar. If you set the value 2 then suppose toady is 24/4/2025 and user will see 24/4/2025 and 25/4/2025 unavailable to book.
Pre Booking block Days
If you set for example this option to 1 then one extra day before the rental period will be blocked. For example with pre booking block day is given as 1 a customer books the product from say 24/4/2025 to 26/4/2025. Then on the front end calendar the product will be blocked from 23/4/2025 to 26/4/2025
Post Booking Block Days
If you set for example this option to 1 then one extra day after the rental period will be blocked. For example with post booking block day is given as 1 a customer books the product from say 24/4/2025 to 26/4/2025. Then on the front end calendar the product will be blocked from 24/4/2025 to 27/4/2025
Time Interval
You can set your time interval for you calendar. You have to always set a time interval otherwise, availability management won't properly. However this will not work if allowed time is given.
Show Product Pricing
You can select if you want to show the daily pricing of the product or the hourly pricing of the product via this feature.
Allowed times
You can set the allowed times which will show in the front end of the
calendar. Such as, 07:00, 08:00, 09:00, 10:00, 11:00, 12:00
Choose Booking Layout
This allows you to choose the layout of the product. we have normal layout or for uber like layout you can choose modal layout
Select Weekend
If you select weekend from here these day will be unavailable for booking in front-end.